
Audio Interface Guide: What It Does, Do You Need One, and How to Choose (Australia 2026)
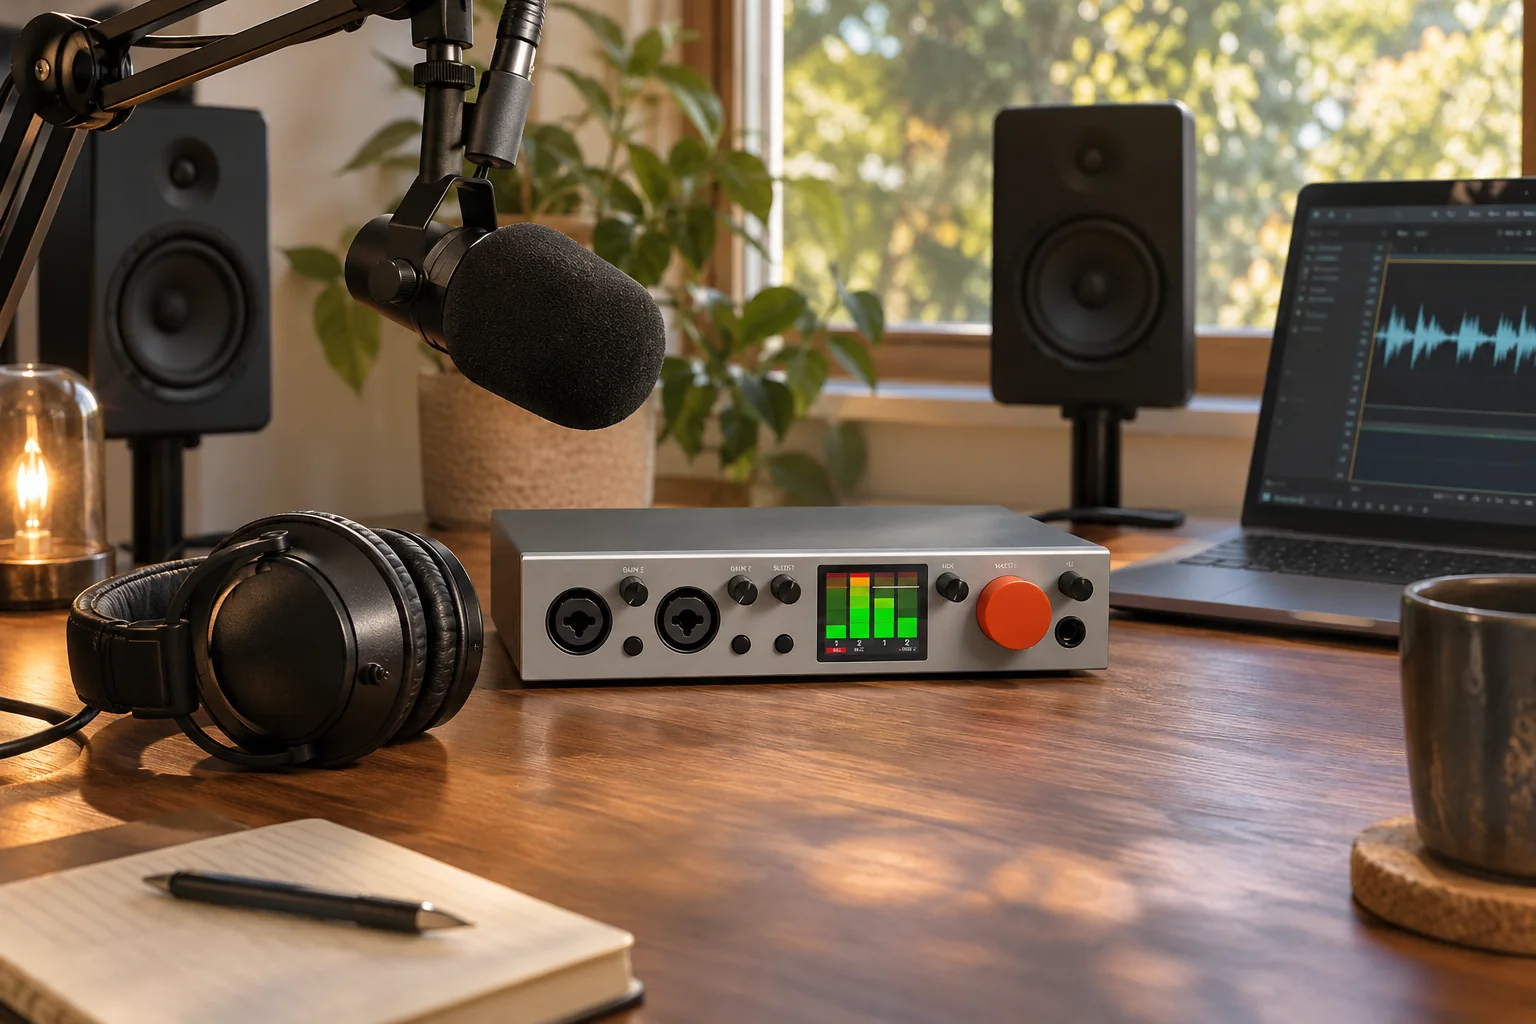
An audio interface is the box that gets professional microphones and instruments into your computer, and gets clean sound back out to your headphones and speakers. If you want to record an XLR mic, a guitar or a synth properly, you need one. Most people only need two inputs, and the spec that decides whether your mic sounds good isn’t the one printed biggest on the box.
Buy an audio interface if you use an XLR microphone, record guitar or bass, or want proper studio monitors. Count the sources you’ll record at the same time and buy that many inputs, plus one. Check the mic preamp’s maximum gain before anything else: low-output dynamic mics like the Shure SM7B need about 60 dB. Ignore 192 kHz on the box and record at 24-bit, 48 kHz.
What does an audio interface actually do?
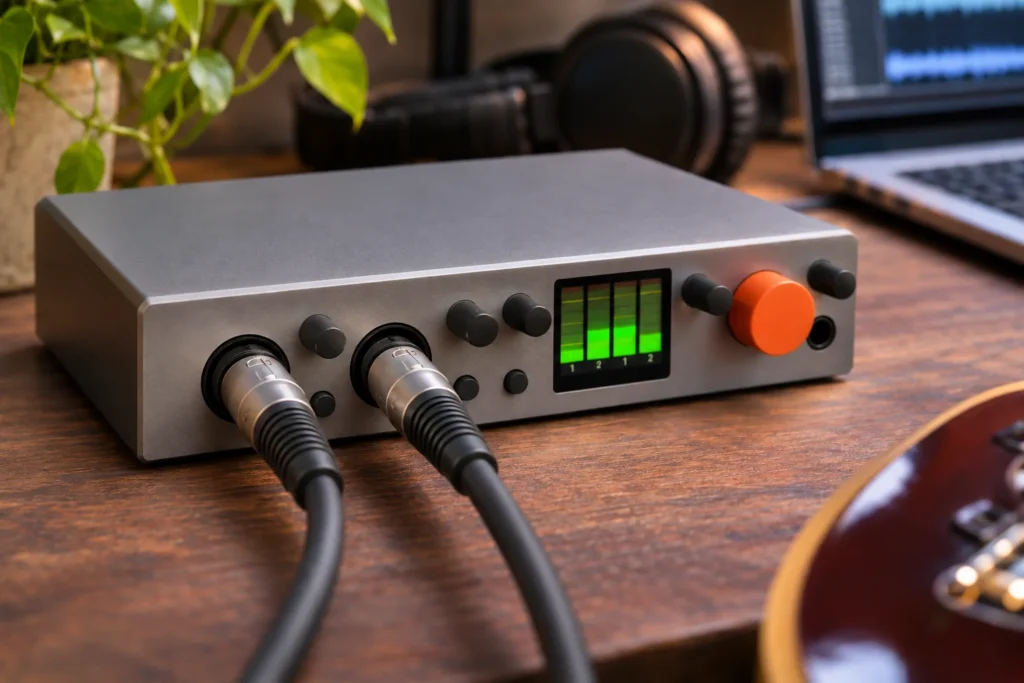
Your computer already has a headphone socket and maybe a mic input, but they’re built for video calls, not recording. An audio interface replaces them with parts designed for music and voice. Inside a typical USB interface you’ll find:
- Mic preamps. A microphone puts out a tiny signal. The preamp boosts it to a usable level, and its quality and maximum gain decide how clean your voice sounds.
- Phantom power (+48V). Condenser mics need power to work. The interface sends it down the XLR cable when you press the 48V switch.
- Hi-Z instrument inputs. An electric guitar or bass needs a high-impedance input. Plug a guitar into a normal line input and it sounds thin and dull.
- Converters. The analogue to digital converter turns your signal into data for the computer. The digital to analogue converter turns it back into sound for your headphones and monitors.
- Outputs. Balanced line outputs for studio monitors and at least one headphone output with its own volume knob.
- Direct monitoring. A control that lets you hear your mic straight from the interface, before it goes through the computer. This is how you sing in time without a delay in your headphones.
Do you need an audio interface?
It depends on what you plug in. Here’s the quick decision:
- You have an XLR microphone: yes. An XLR mic can’t connect to a computer on its own.
- You record electric guitar or bass: yes, for a clean, full tone through amp simulators like AmpliTube or TONEX.
- You want studio monitors: yes. Monitors need balanced line outputs, which a laptop doesn’t have.
- You only use a USB microphone: no. A USB mic has its own built-in interface, and you can’t plug it into an audio interface anyway.
- You only make beats in software with headphones: not essential. An interface still helps with lower latency and better headphone sound, but it can wait.
The trade-off between a USB mic and an XLR mic plus interface is simple. A USB mic is one box and done. An XLR setup costs more at the start, but you can upgrade the mic later, add a second mic for a guest, and plug in a guitar, without replacing everything.
How many inputs do you need?
Count the sources you’ll record at exactly the same time, not the total gear you own. A singer-songwriter who records the guitar first and the vocal second only needs one input. Add one spare for flexibility, and stop there. Extra inputs cost money and desk space you won’t use.
| You are | Sources at once | What to look for |
|---|---|---|
| Solo vocalist or voice-over artist | 1 mic | 1 good mic preamp with enough gain |
| Singer-songwriter | Mic + guitar | 2 inputs: 1 mic preamp, 1 Hi-Z |
| Two-person podcast | 2 mics | 2 mic preamps, ideally 2 headphone outputs |
| Electronic producer | Synth (stereo) + MIDI gear | 2 line inputs and MIDI in/out |
| Streamer | 1 mic + computer audio | Loopback, so game or music audio goes into the stream |
| Band or drum kit | 8 or more mics | 8 or more mic preamps with phantom power |
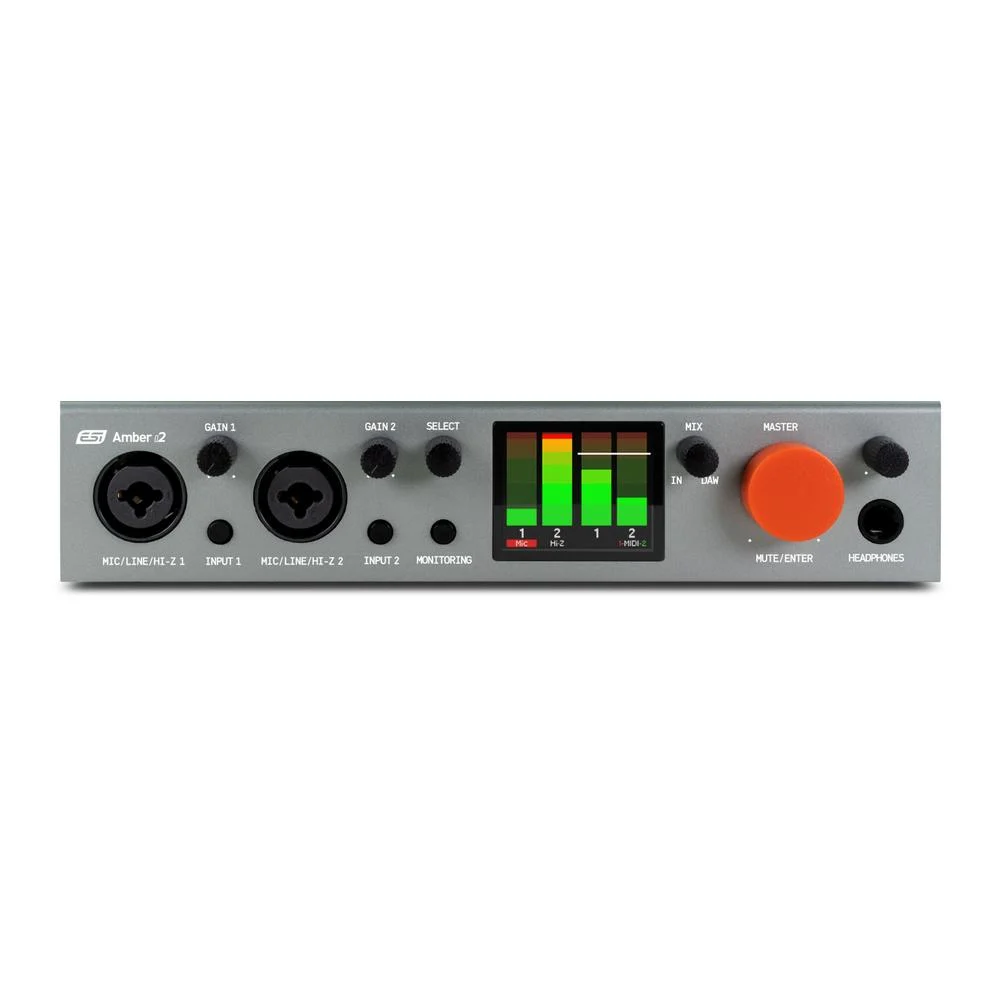
For most home studios that means a two-input interface. The ESI Amber i2 is a good example of the layout to look for: two Class A mic preamps with 48V, two Hi-Z inputs, MIDI in and out, and a stereo loopback function for streaming.
The spec that matters most: mic preamp gain
This is the part most buying guides skip, and it’s the reason so many first recordings sound quiet and hissy. Every mic preamp has a maximum gain, measured in dB. Condenser mics are loud and need very little. Dynamic mics, the kind most podcasters and home vocalists should use in an untreated room, put out much less signal.
The Shure SM7B is the classic example. Shure says the preamp you use with it should have at least 60 dB of gain. Plenty of budget interfaces stop short of that. For example, the ESI Amber i1 preamp is rated at 51 dB of gain, and the iRig Pro Duo I/O at 50 dB. That’s plenty for condensers and most stage dynamics, but with an SM7B you’d be running the knob near its limit, where hiss rises.
Before you buy, look up two numbers: your mic’s sensitivity and the interface’s maximum preamp gain. If you own or plan to buy a low-output dynamic mic like the SM7B, either choose an interface with 60 dB or more, or add an inline booster such as the sE DM1. Shure lists boosters of this type as adding about 25 to 28 dB of clean gain.
Specs you can mostly ignore
Almost every interface now advertises 24-bit and 192 kHz. That number sells boxes, but it won’t change your recordings much. Record at 24-bit for headroom. Use 48 kHz for anything that ends up with video (YouTube, Reels, film) and 44.1 or 48 kHz for music. Higher sample rates make bigger files and load your computer harder, for differences most listeners can’t hear.
Spend your attention on the things you’ll notice every day instead: enough clean gain, the right number of inputs, a headphone output loud enough for your headphones, reliable drivers and controls you can reach without a mouse.
Outputs: monitors, headphones and two-person sessions
Two balanced 1/4″ TRS line outputs drive a pair of active studio monitors. Use balanced TRS cables for them, not guitar leads, to keep hum and noise out. If you do get a hum through your speakers, our guide to fixing ground loop hum walks through the usual causes.
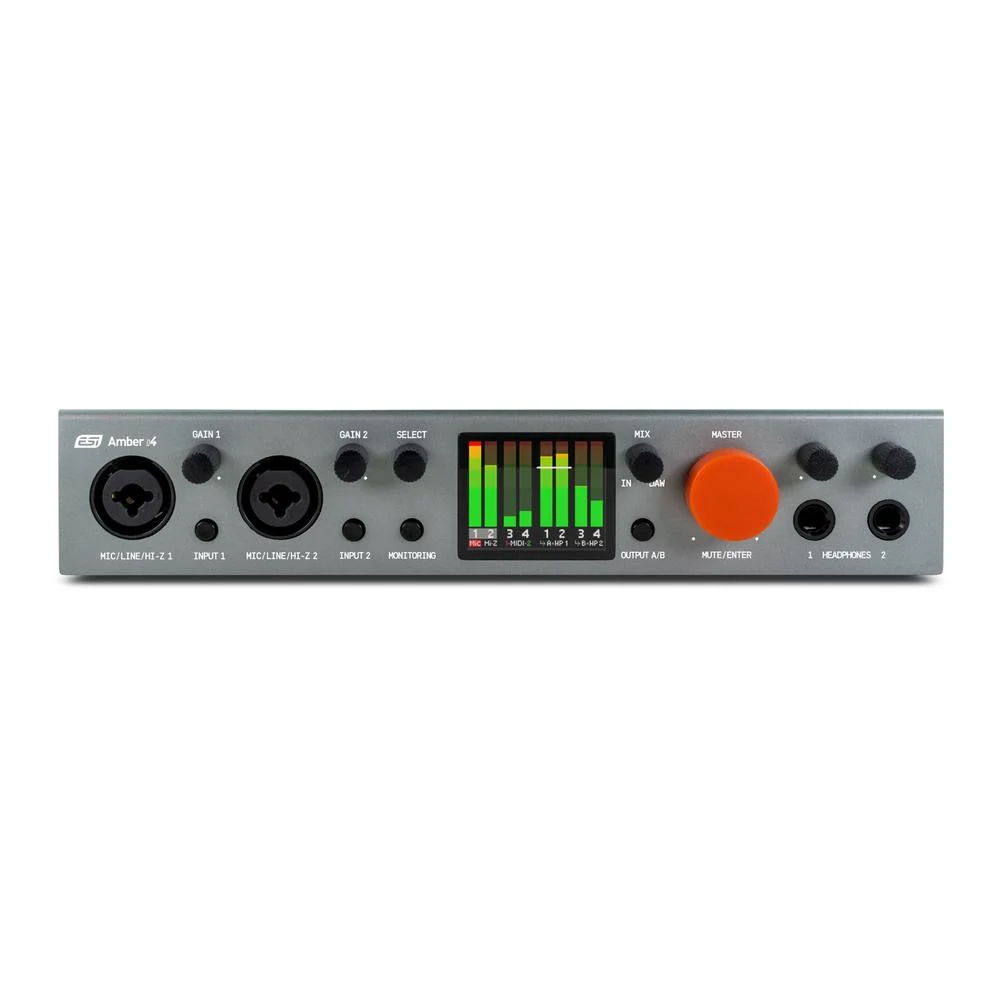
If two people record together, look for two headphone outputs with separate volume controls. A podcast host and guest, or a singer and a guitarist, each get their own level. The ESI Amber i4 adds exactly that over the i2: two independent headphone outputs, four balanced line inputs and four line outputs, so you can also run a second pair of speakers for checking mixes.
USB-C, Thunderbolt, iPhone and iPad
For a home studio, a USB interface is all you need. USB-C models also work on older USB-A ports with the right cable. Thunderbolt interfaces exist, but they’re aimed at large professional rigs.
If you want to record on an iPhone or iPad, look for the words class compliant. A class compliant interface works without installing a driver, which is the only way it can work on iOS. The ESI Amber i1 is class compliant and ESI lists it as working with iPhone and iPad.
Power is the catch on mobile. A phone may not supply enough power for an interface plus phantom power for a condenser mic. Interfaces with their own power option solve that. The Amber i2 has an optional 5V power input, and the iRig Pro Duo I/O runs on two AA batteries, USB power or an optional power supply. It ships with Lightning, USB-C and USB-A cables, so it covers iPhone, iPad, Android, Mac and PC from one box.
Only need to plug one XLR mic into a phone or camera? A dedicated adaptor like the iRig Pre 2 is simpler than a full interface. Its two AA batteries give true 48V phantom power for about seven hours, or up to 20 hours with phantom off.
Loopback: the feature streamers and podcasters need
Loopback sends your computer’s own audio (a game, a YouTube clip, a caller on Zoom) back into the interface as an extra input. Your streaming or recording app then captures your mic and that audio together, with no extra cables or software mixers. If you stream or record online interviews, put loopback on your must-have list. The Amber i1, i2 and i4 all include it.
How to set up your first audio interface
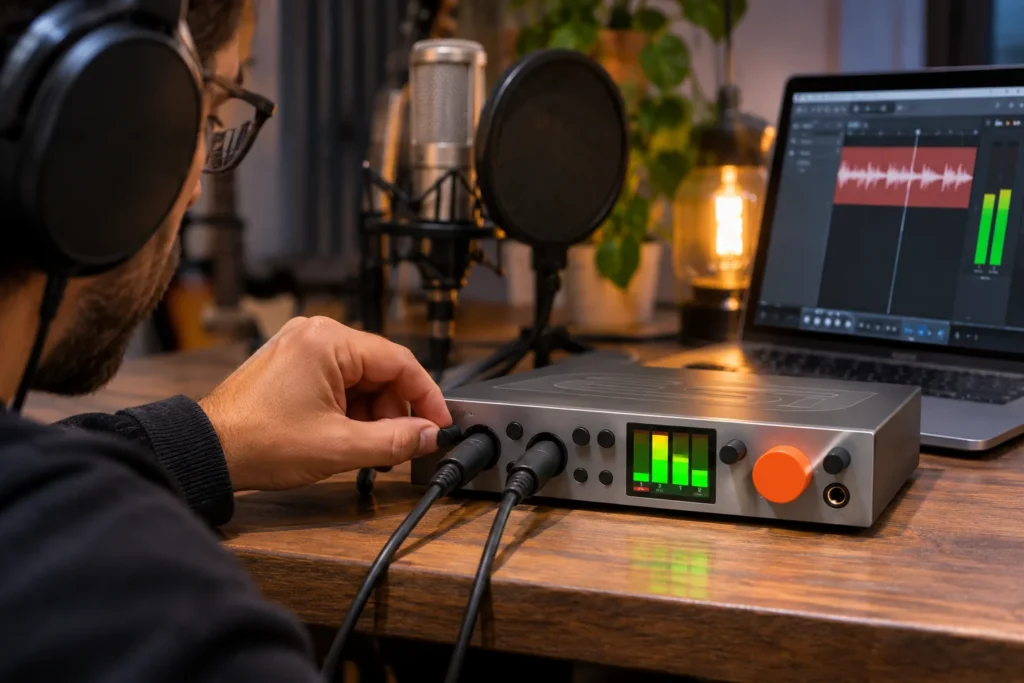
Most “my interface doesn’t work” problems come from the first ten minutes. Follow these steps in order.
- Install the driver first (Windows). On Windows, install the manufacturer’s ASIO driver before you plug in. On a Mac, class compliant interfaces work straight away, but install the control panel app anyway if one exists.
- Plug directly into the computer. Use a port on the computer itself, not a cheap unpowered hub. Hubs are a common cause of dropouts and crackles.
- Pick the interface in your recording software. In your DAW’s audio settings, choose the interface for both input and output. Set the sample rate to 48 kHz.
- Set the buffer size for the job. While recording, use a small buffer (64 or 128 samples) so there’s less delay. While mixing, raise it to 512 or more so plug-ins run without clicks.
- Turn on 48V only when needed. Switch phantom power on for condenser mics. Turn the monitors down before you switch it on or off to avoid a loud pop.
- Set the gain by ear and by meter. Sing or play as loud as you will in the real take. Turn the gain up until the loudest moments peak around -12 dBFS in your DAW. Leave that headroom; 24-bit recording doesn’t need you to record hot.
- Use direct monitoring. Listen through the interface’s direct monitor control, not through the DAW, and you’ll hear yourself with no delay at all.
Common mistakes with a first audio interface
- Buying inputs you’ll never use. An eight-input interface for a solo vocalist means paying for preamps that sit idle. Spend the difference on a better mic or headphones.
- Pairing a low-output mic with a low-gain preamp. The result is a quiet, hissy recording that no plug-in can fix. Check the gain numbers first.
- Recording too hot. If the meter hits red, the recording is clipped and ruined. Aim for peaks around -12 dBFS instead.
- Hearing an echo of your own voice. That’s latency from monitoring through the computer. Use direct monitoring or lower the buffer.
- Plugging a guitar into a line input. Use the Hi-Z or instrument input, or switch the combo input to instrument mode.
- Using unbalanced cables for monitors. Use balanced TRS cables from the line outputs to your speakers.
Which audio interface should you buy?
Match the interface to how you work, then check the gain spec against your mic.
- One mic or one guitar, on a budget: the ESI Amber i1. One mic preamp with 48V, a separate Hi-Z input, line inputs for a keyboard, loopback and iPhone/iPad support. Pair it with a condenser, or add an inline booster for an SM7B.
- Singer-songwriters and two-person podcasts: the ESI Amber i2. Two mic preamps, two Hi-Z inputs, MIDI and loopback.
- Duets, podcasts with a guest, or two sets of speakers: the ESI Amber i4, for its two headphone outputs and four line outputs.
- Recording on a phone, tablet or on location: the iRig Pro Duo I/O, with battery power, two combo inputs and MIDI.
- Bands and drum kits: the ESI U108 PRE, with ten mic preamps, 48V phantom power, two Hi-Z inputs and eight balanced line outputs.
For most Australian home studios, a two-input USB interface with 48V, a Hi-Z input and loopback is the right first buy. Spend your budget on clean gain and the inputs you’ll really use, not on 192 kHz or channels you won’t fill. If you already own a low-output dynamic mic, check the preamp gain before anything else.
Frequently asked questions
Can I plug a USB microphone into an audio interface?
No. A USB mic already has its own interface inside and connects straight to the computer. Audio interfaces take XLR mics, instruments and line-level gear.
Is a more expensive audio interface worth it for a beginner?
Usually not. Your room, your mic and your mic technique make a bigger difference than the gap between a good budget interface and a mid-range one. Pay more only for features you need, such as more inputs, two headphone outputs or more preamp gain.
Why does my microphone sound so quiet through my interface?
Most often it’s a low-output dynamic mic on a preamp without enough gain. Check the preamp’s maximum gain against the mic’s needs. An inline booster adds clean gain before the interface and fixes it.
What buffer size should I use?
Use 64 or 128 samples while recording so you hear less delay, and 512 or more while mixing. If you hear clicks and dropouts, raise the buffer. If you hear yourself late, lower it or use direct monitoring.
Can phantom power damage my microphone?
Turn 48V on only for mics that need it, such as condensers and active inline boosters. Turn your monitors down before switching it, and check your mic’s manual if you use a ribbon mic.
Does an audio interface improve sound for listening to music?
It can. The converters and headphone amp in a decent interface are usually better than a laptop’s headphone socket, so music and mixes often sound clearer, especially on studio headphones.
Ready to pick your interface?
Compare every model we stock by inputs, outputs and features, from compact two-input boxes to ten-preamp band interfaces.
Off The Record: 12 studio secrets nobody bothers to tell you
Why does the radio sound huge while your song sounds small? This free guide answers that and eleven other questions, with simple steps you can try in your next session.
